
Contouring is a make-up technique aimed at emphasizing the advantages of the face and hiding imperfections. It creates visual volume where there is not enough and makes features harmonious. You can visually tighten the chin, narrow the nose, make a wide face look more elegant — all without plastic surgery. But how do you contour correctly?
Before starting: Have the Sculptor, Highlighter, and buffing brush at the ready.
- The sculptor is a matte cosmetic product. You can use it to shade areas of your face and imitate shadows.
- Highlighter is to the face what hot sauce is to a burrito. You can use it to highlight areas of the face, creating a fresh look.
- A buffing brush will help blend it all together. Also, you can use a sponge and other makeup tools. Choose the ones with the help of which you can accurately and smoothly blend the sculptor and highlighter because there should be no clear boundaries between them.
Is your face washed, hair back, with good lighting? Get started! You’ll need to apply the sculptor on the areas that need to be darkened and the highlighter on the areas you want to highlight.
Contouring depending on the type of face.
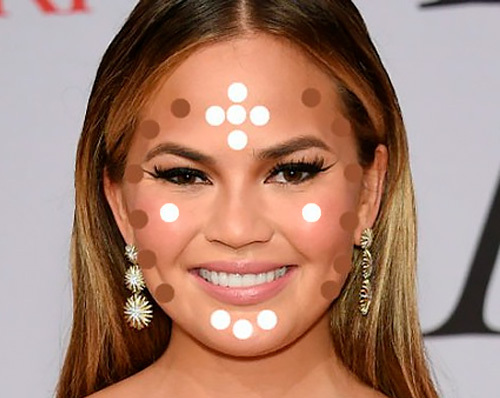
Round face
The ultimate goal of contouring a round face is to create more of a heart shape. Round faces needs to be slimmer at the chin, wider at the cheekbones, and have angles and dimensions from all directions. Darken the areas under the cheekbones and along the edges of the face. Highlight the cheek hollows, forehead and chin.
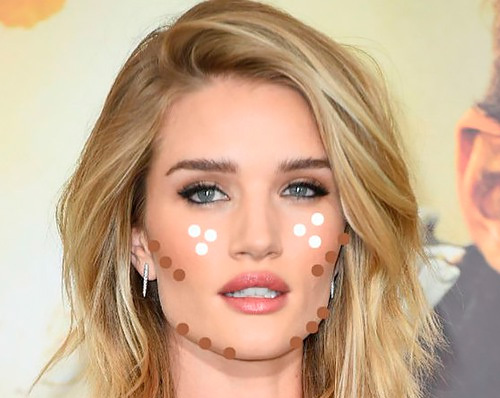
Square face
Apply the sculptor on the cheek hollows, on the temples, jawline, and sides of the nose. Highlight the upper cheekbones, forehead, eyebrows, and a chin.
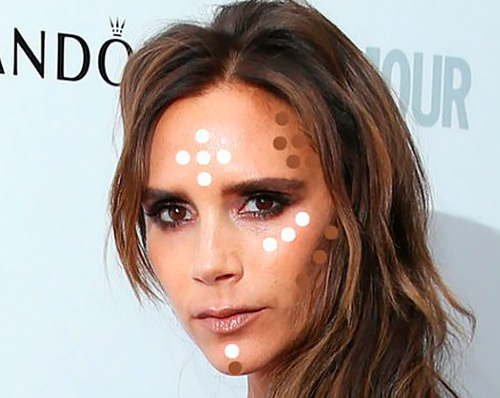
Triangle face
Darken the cheek hollows, temples, sides of the nose and a chin. Highlight the bridge of the nose, upper cheekbones, chin, and the center of the upper lip.
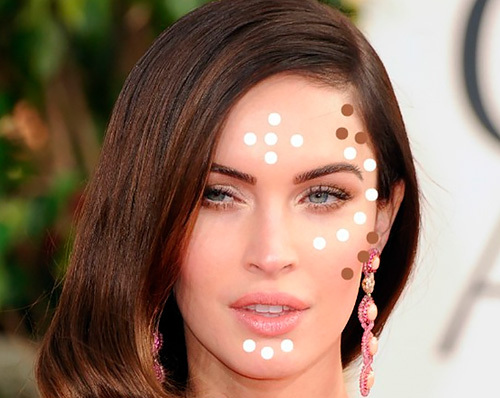
Oval face
The face of this form is the least in need of correction, so it is enough to darken the forehead on the sides of the hairline and the cheek hollows. Highlight the center of the forehead, chin, temples, areas above the eyebrows and under the eyes.
Tips for faces of every shape:
To visually narrow the nose, apply two lines along the bridge of the nose with the sculptor and sweep the product towards the cheeks.
To narrow down the forehead, apply the sculptor on the hairline. If the forehead is too wide, apply the sculptor on the temples.
To make the oval of the face more expressive, darken the cheek hollows.
For a fresh and rested look, apply highlighter above and under the eyebrows, on the bridge of the nose, under the lower eyelids and in the center of the chin.